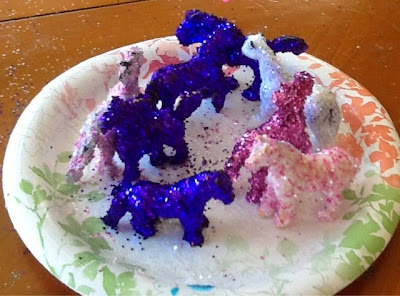
Anyway, these SWAPs are from our last camp and they are all for the adult volunteers. Yes, I came up with and made SWAPs for my husband and Co-leader because they were not going to do it themselves. As usual, my co-leader was very proud that she can get me to do her crafting for her and my husband was both appreciative and couldn't careless in turns with a bit of reluctant indulgence of my insanity mixed in.
Lobster SWAPs
This is what I came up with for my husband, aka "Dr. Lobster." They are actually pretty quick SWAPs, if you excuse for the drying time.
 |
Supplies:
1. Red Tempera Paint
2. Dixie cup
3. Small twist shells
4. Red pipe-cleaners
5. Scissors
6. Googly eyes
7. Low heat hot glue gun
8. Safety pins
9. Tags with whatever you want printed on them
Steps:
1. Drop several shells at a time into a half inch of red paint. (The hand you see is my daughter. She gladly helped with this. Thought it was the most fun ever).
3. Cut pipe-cleaner into 2 inch lengths.
7. Fold Tags and pin to the claws. Tada!!!
1. Red Tempera Paint
2. Dixie cup
3. Small twist shells
4. Red pipe-cleaners
5. Scissors
6. Googly eyes
7. Low heat hot glue gun
8. Safety pins
9. Tags with whatever you want printed on them
Steps:
1. Drop several shells at a time into a half inch of red paint. (The hand you see is my daughter. She gladly helped with this. Thought it was the most fun ever).
 |
2. Let dry several hours or overnight.
 |
3. Cut pipe-cleaner into 2 inch lengths.
 |
4. Bend length in half, then roll in end to make to tiny "claws."
 |
5. Using hot glue, attach the dried shell to the center.
 |
 |
6. Glue on googly eyes. I used elmers because I had the time and it looks cleaner, but you can use hot glue for faster results.
 |
7. Fold Tags and pin to the claws. Tada!!!
 |
 |
Firefly SWAP
My Co-leaders camp name is "Firefly" and we've been talking about a possible firefly SWAP for a year. In the end, however, she lost interest, I got fixated on my "vision," and this is what I came up with (all on my own).
I loved how they turned out (though part of me still feels they need legs). They could be done by girls but I think I'd stick to Juniors and older.
 |
| Finished swarm of fireflies |
Supplies:
1. A variety of gold beads (I got this box from Michael's $7.99 before coupon)
 |
2. Glow-in-the-dark paint
3. Small paint brush
4. Low heat hot glue gun (I got glue on my fingers a lot during this one so low heat is important. It's still uncomfortable, but causes no real damage.)
5. Googly Eyes
6. Gold Pipe-cleaners
7. Gold Florist Wire
8. Scissors or wire cutters
9. Safety pins10. Tags with whatever you want printed on them
Steps
1. Hot glue smaller/ shorter beads together.
2. Paint the ends of a variety of beads with glow-in- the- dark paint and let dry.
 |
3. Use glue gun to attach googly eyes on the other end of beads. (Elmers didn't work for me on this one).
 |
4. Cut and twist the florist wire into an antenna. Bend end where antenna are joined to make shelf to glue to bead.
 |
5. Use glue gun to glue antenna "shelf" on bead, hold for ten seconds to set. Add a dollop of glue on top if seems unstable.
 |
6. Cut gold pipe-cleaner, wrap around your finger and twist ends together to make two wings each. Each pipecleaner will make 4-5 wings.
7. Hot glue wings on either side of bead.
 |
8. Allow a minute to dry then bend wings out.
 |
9. Pin tag onto wing
 |
 |
For flat beads put eyes on the flat, wide surface, otherwise it looks really bizarre. My co-leader laughed for a half hour over one fat little dude.
 |
| Eyes on flat side |
 |
| Fat Dude my co-leader found so funny. I also tried red faces on the first batch before deciding it was too much work and I didn't like the look. |
10. Don't forget to remind the girls you give these out to to check them out in the dark (if it's a day camp). They do actually glow in the dark! Sorry I couldn't get them to photograph in the dark.
For extra fun, carry your SWAPs in a jar like real fireflies. :)
 |
Mermaid Shrinky Dink SWAP
And these were my SWAPs. They are very like my Fairy SWAPs, so this will just be a quick tutorial in pictures. :)
 |
| Mermaid Shrinky Dink |
 |
| Thread embroidery floss |
 |
| Add Beads |
 |
| Hot Glue Shell on back of bead |
 |
| Thread more beads and a small shell bead |
 |
| Add safety pin and double knot |
And Done! Camp SWAPs are finished. Hurrah! Next week we start the last couple of meetings of the first year!