Tuesday, September 2, 2014

Garden Field Trip


This may have been my favorite field trip from that first year.  Looking back, it was very likely completely unnecessary.  We didn't earn another Petal and while it reinforced a bunch of things from the Journey it wasn't needed in our already busy schedule.  That being said it was awesome and I'm so glad we went.  The grounds at Green Spring Gardens are beautiful.  The day was gorgeous and the tour guide spectacular.

We only had about half our girls show up (there were a few last minute emergencies) but the girls that went had a great time.  We also created a worm composting bin and the worms are still, miraculously, alive in my garage.


Green Springs Gardens Field Trip
Early May


Green Spring Garden Horticulture Center


Goals and Badges:

As I said, this wasn't a field trip that we needed for anything.  Technically, it would have been part of their Bumble Bee patch for the Garden Journey, but they had already earned that.  We did read the 5th chapter from the Journey Book.   It also fed into our last two petals, "Use Resources Wisely" and "Make the World a Better Place" as well.  


*******

                10:30am       Drop off/gathering

                10:45           Drive to Green Spring Garden

                11:30           Arrive 

                11:45           Lunch and read from Journey Book

                 12:30          Tour/activity

                 2:00            Pack up to head home

                 3:00           Arrive back at my house

*******


Hand Out for this field trip


Email about Field Trip:

The Sunday May 5 Trip to Spring Gardens will start at my house at 10:30 (that’s 30 minutes earlier than previously announced.  It’s a long drive and we want to make sure we get there on time.)  We plan to be back around 3:15, but leave me a number to text you when we get home and you won’t have to wait in my driveway.

Like the last field trip please bring/remember:

  1. Be in full Daisy uniform
  2. Wear sneakers, we’ll be out in the grounds
  3. Bring/wear a light coat or jacket, we’ll be outside a lot
  4. Bring a packed lunch for before the tour. 
  5. Bring a water bottle instead of a drink box or pouch, big enough to last the whole trip. It can have any drink, doesn't have to be water.
  6. Give them breakfast before, lunch will be between 12 and 12:30.
  7. Bring a backpack to keep your lunch and jacket in. The girls are responsible for carrying their own stuffThe chaperones will no longer carry bags and jackets!

K____ will send out a message with the permission slip attached.  Try to have it for Friday.  Thanks.  


Gathering

I'm sure we had a Gathering Activity, we always did, but for the life of me I can't remember what it was.  Oh well.  I do remember the drive being a bit of a hike and making a few wrong turns on the way.


Lunch and Story Time

When we arrived we were immediately impressed by the Gardens.  We walked around a bit until we found a set of picnic tables behind the Horticulture Center where we were to meet our tour guide.  Everyone had a packed lunchbox and water bottle.  We had the girls eat while my co-leader read them chapter 5 in the Journey Book.  It was about worm composting so that was apropos.


Chapter 5


Their picnic


After lunch, we let the kids play in the garden until our tour guide arrived.


View of Horticulture Center from the back.


Garden Program

We had a lovely woman, who was very good with with this age group, as a tour guide.  First, she taught the girls all about worm composting and we made our own composting bin to take home.  She then had a recycling game to help teach the girls about what to feed the worms and what to recycle.  Finally, she took us on a long walk through the woods, around the pond, and over the grounds.


Garden and patio we worked in.


Worm Composting

I'm far from a worm composting expert, but as I understand it, we made the simplest form of a compost bin.  Considering I still have it, alive and functioning, in my garage a year later with minimal effort on my part I can definitely recommend this method.  It's easily something you can do in the backyard, alone, or with your troop.

Supplies for composting:
1. A medium size plastic container with a lid and air holes drilled in about 2 inches from the top.
2. Red wiggler worms (earthworms from the backyard will not work.) You can order them from amazon or get them from a friend who composts.
3.  Wet newspaper.
4.  Organic material for food.
5.  Dirt.


This is where you would most likely get a whole lot more detail if this wasn't a year later, but I'll do my best. ) Our tour guide had the girls soak and wring out newspaper, then tear it into shreds to lay down a layer of bedding in the container.  The container was placed under a table so the sun didn't dry it out.


Preparing the newspaper


Looking in the "parent" worm bin in the shade


Then our guide added dirt and the girls mixed it all up.


Adding dirt


Mixing


Then came handfuls of her already created compost from the "parent bin," along with the worms.  We were surprised at how good all the girls were with handling the worms.  It was pretty cool. 


Each of the girls with a red wiggler


Red wiggler worm


After that, the girls added old veggies and another layer of bedding then we sealed the bin up and took it home.  See the afterword for the wormery today.  


Here's a good website that has more accurate info than me:  
http://www.planetnatural.com/composting-101/vermicomposting/


Recycling game

I could tell our tour guide understood little girls by her next activity.  She had two of the moms stand at the end of a long walkway in the garden, one carrying a recycling bin and one a "compost bin."  On the other end was a pile of various toy foods and recyclables.  The object of the game was for the girls to run the toys to the other end of the garden to sort the pile.  There were some trick foods, like meats and things (plastic of course), that they were supposed to leave behind.


Moms doing their part


Girls enjoying the recycling game


Objects they sorted


Walk around the grounds

The last thing we did was take a hike around the grounds.  Our tour guide took us down a path, through the woods, around the pond, and through the flower gardens, talking to the girls about the various flowers and wildlife along the way.


Start of the tour


Creek in the woods


Geese by the pond


Turtles in the pond


Goslings


Pond


The final stretch back across the lawn to the Horticulture Center


Enjoying the day


Afterword:  Worm Compost 14 months later.

These worms have lived on a shelf in my garage for 14 months.  I'm amazed that they are still alive.  I didn't touch them for almost three months in the middle of the winter (and it was a terrible winter), partially because of forgetfulness and partially because I didn't want to let the cold air in.  I think they survived because the composting keeps it warmer in the bin and because without food they went into a kind of hibernation.


Wormery in my garage

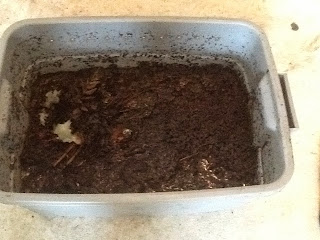
Inside of the bin after 14 months

As I'm writing this I'm inspired to actually harvest the worm casings for the first time.  It was supposed to be done 6 months after the bin was started, but that would have been December and that wasn't happening.   I did scoop out some castings and mix it with dirt in April when the troop was doing some planting, but didn't do a full harvest until now.

According to the directions I found on the website I listed, I pulled out the partially digested food and pushed the rest to one side.


Worms and casings to the left

I poured out the liquid fertilizer "worm juice" into a bowl and used it to water my pumpkins.  

"worm juice" that got poured on my pumpkins 


Worm


Worm again

Then I put new bedding and food on the clean side.  I didn't have a lot of rotten veggies so most of the food I added was weeds from my flower beds.


Set up to lure the worms out of the casings to harvest easier

Now back on the shelf for two weeks and hopefully all the worms will have moved to the clean side of the wormery.


Two weeks Later:

In the next two weeks, we added some strawberry tops and banana peals to the food side of the bin.  When it was time to harvest it was looking pretty gross.  Lots of worm casings.  Neither of my kids would come near it.  There's an unpleasant smell but it is very mild.  


Bin after opening two weeks later (yuck!)


I got out a pair of garden gloves and scooped out the casings, trying my best to keep as many worms as I could out of the fertilizer.  I was shocked at how many worms there were.  I'd say a minimum of  50, but there could have been as many as 100.  I don't think we started with more than 10.  


Harvested casings


After I filled up a sand bucket (it took maybe ten minutes) I still had casings left in the bin but they were so packed with worms it was hard to separate any more out, so I just spread the remains back over the bottom of the bin and added more food.


Cleaned out bin, with worms and new food.


Then came a nice thick layer of new "bedding" (aka wet newspaper).  There was a good chance I wouldn't be doing much more with these little guys for the next month or more.  And then the bin went back on the shelf in the garage.


New bedding


The casings I brought to the backyard.  After the big garden from last year we decided to plant a simple pumpkin patch, but we did have a few hitchhiker tomato plants grow on their own from last years squashed tomatoes.


Pumpkins and tomatoes ready for fertilizer


The fertilizer would have probably done more good at planting, but it was too late so I packed it around the roots,


Fertilizer added


then watered the garden.  


"Before" Garden


And done.  For now.  :)


Monday, August 25, 2014

Planting Party: Meeting Fourteen


Our Planting Party was quite the endeavor.  The goal was to get 5 six year-olds and 3 seven year-olds to plant a 11x14 foot garden without trampling anything.  That led to me down the rabbit hole until I decided I needed to give them each one-on-one attention while they were planting.  Thankfully, that morphed into the slightly more reasonable, if still elaborate schedule you see below.

We had two additional moms helping that day as well as my 
 next door neighbor, a Girl Scout Junior, and my husband on the grill.  I had one mom doing the rabbit garden and garden game and the other mom and the Junior Girl Scout manning the craft table.  I was in the big garden covered with dirt the entire time while my co-leader kept time and moved from station to station making sure everything ran smoothly.  Incredibly, it did.


Daisy Scout Meeting Fourteen

Planting Party!
First Week in May

Goals and Badges:

At the beginning of the meeting, we finished up the Honey Bee Award and had a simple ceremony to give it out.  We learned another song for the end of the year show and added Honey the Honey Bee and Clover from "Using Resources Wisely" to our garden posters.  Then we planted our Vegetable Garden for our Amazing Daisy Award and made Mother's Day gifts.


Patch set with Honey Bee and Amazing Daisy Awards.


*******


Arrival - 4:05            Honey bee craft

               4:05-4:15    Circle: Promise, Songs, Hello in Dutch and Persian
               4:15-4:25    Honey bee Song
               4:25-4:30   Honey bee Ceremony

               4:30-4:50   Dinner


                                        Group A                 Group B                       Group C              Group  D    

              4:50-5:10    Plant in garden   Rabbit garden          Crafts                  Crafts
              5:10-5:30    Rabbit garden     Plant in garden        Crafts                  Crafts

              5:30-5:40   Break for drink and cleaning up

    
              5:40-6:00   Crafts                Crafts                          Plant in garden   Rabbit garden
              6:00-6:20   Crafts                Crafts                          Rabbit garden     Plant in garden

              6:20-home   Ice Cream and closing


Crafts

1. Clover in Garden
2. Paint Suncatchers
3. Decorate Boxes

*******


Email I sent out about the Planting Party:


Friday’s meeting is going to be a big undertaking.  Here are somethings to help it run smoothly:


1. Drop off your daughter at 4 at the front door (we’ll be starting the meeting upstairs) and pick them up in the backyard at 6:30.

2. I’m planning on A___ and J____’s help. Anyone else planning on staying, let me know (so I can make sure you have a job ).
3. Dress- Bring their vest, we’ll be giving out honey bees in the first part of the meeting, but otherwise dress in old clothes that can get dirty. I recommend old jeans, because they protect your knees in the dirt. If they want to wear shorts warn them their knees will get dirty. I also strongly recommend crocks if they have them, but otherwise just make sure whatever they have can get muddy.
4. Bring an extra set of clothes in case they get really dirty and wet.
5. Bring kids gardening gloves if you have them (I have three pairs, I really only need one more).
6. Please bring the food item you signed up for.  If your kid doesn't like what’s on the list, feel free to have them bring something they will eat.
7. Please bring a box the size of a large shoe box.
8. Also bring the “Using Resources Wisely" Worksheet, but they don’t need their journey book.


Gathering


For the gathering we had the girls' Garden Posters set out for them to add Honey the Honey Bee.   I laid out an example and the supplies and the girls were able to make them without further instruction.

My Honey the Honey Bee

Supplies for Honey
1. Yellow pom-poms
2. Black pom-poms (ours were sparkly) 
3.  Black pipe-cleaners cut to 2.5 inch lengths
4.  Googly eyes
5.  Wings cut from white cardstock
6.  Black and gray sharpies
7.  Elmer's type glue


One of the girl's Honey


For the girls who finished too quickly, I had red sequins and black sharpies to make ladybugs.


Poster with red sequin ladybugs


Daisy Circle


We gathered the girls around the Daisy Circle and recited the Girl Scout Promise, then sang several of the songs we had learned over the year.  After they had settled a bit, we (as per the handbook) said hello in Dutch and Persian.  These languages are supposed to represent the countries Tula the Tulip originate from.  I like to use Omniglot on my iPad to model for the girls so I don't butcher the pronunciation.  Also it's more fun.  The girls found it very funny how not different the Dutch "Hallo" is.


After, we went over what the rest of the afternoon's schedule and broke the girls into pairs.  My co-leader and I spent a good amount of time prior to the meeting choosing the groups.  We wanted the pairs to get along, but we also wanted the girls to be with buddies they wouldn't normally choose to foster friendships outside their comfort zone.    


Honey Bee Ceremony


For the Honey Bee Award ceremony we put on "Flight of the Bumble Bee" and had the kids pretend to be bees flying about.  Then we called them over one by one so I could Badge Magic the bee onto their garden patch.

We didn't have a cd of "Flight of the Bumble Bee" and didn't want to spend $0.99 on it on iTunes so we used a YouTube site like this one:

YouTube "Flight on the Bumble Bee"


Baby Bumble Bee Song

After the ceremony, my co-leader ran off the join my husband and the other moms to get dinner ready while I took the girls out back where there were plenty of dandelions to pick.  I don't know about you, but when I was a girl we always sang "Baby Bumblebee" with a freshly plucked dandelion.   

Now, I know this song doesn't exactly embody the nature loving ideals we're trying to impart, but its catchy, fun, and quickly became the girls' favorite.  Also, I've noticed that most of the Girl Scout Camp Songs are at least this morbid, so... Yeah.  

If you don't know this song from childhood, in the first verse the girls hold the flower in their cupped palms.  In the second, she smushes it violently between two hands.  In the third, she pretends to lick it up.  In the fourth, she clutches her stomach and pretends to vomit (everyone's favorite part).  And in the fifth, they sweep it up.  When we do this my daughter always points out that is the only verse where mommy would actually be proud.


Teaching the girls the "Baby Bumble Bee" Song


Bringing Home a Baby Bumble Bee 

I'm bringing home my baby bumble bee
Won't my Mommy be so proud of me
I'm bringing home my baby bumble bee -
OUCH!! It stung me!!

I'm squishin' up my baby bumble bee
Won't my Mommy be so proud of me
I'm squishin' up my baby bumble bee -
EW!! What a mess!!

I'm lickin' up my baby bumble bee
Won't my Mommy be so proud of me
I'm lickin' up my baby bumble bee -
ICK!! I feel sick!!

I'm throwin' up my baby bumble bee
Won't my Mommy be so proud of me
I'm throwin' up my baby bumble bee -
OH!! Another mess!!

I'm Cleanin' up my baby bumble bee
Won't my Mommy be so proud of me
I'm cleanin' up my baby bumble bee -
Bye-Bye baby bumble bee!!


Dinner


We had a sign-up for dinner items on shutterfly.  If I remember correctly we had hot dogs, baked beans, corn on the cob, watermelon, chips, and lemonade.   This is pretty standard fare for us.   All our girls eat hot dogs.   We had ice cream sandwiches as a carrot for being good at the end of the meeting. 


Planting in The Big Garden


I planted the big garden with the girls.   I had measured everything out and put popsicle sticks where each vegetable would be planted earlier in the day.  This may seem like overkill but I've learned to make a "garden map" for all my vegetable gardens, the only difference for this one was that I had it laminated and drew in the veggies because most of the girls couldn't read yet.


Map


I divided the map into four strips so each girl got to plant different types of plants.  We added pea and bean seeds to the ones we had planted two weeks prior since you can plant a lot of those close together and they grow fast.  The carrots were also planted from seeds.  Once the plants were in the ground I had peat moss for the girls to sprinkle on the. Then they look turns watering.


The first planters.  Peat moss in the pink bucket.

Popsicle sticks marked where to plant

Tomato plants are in the  back since they get huge.

Next group of girls with the hose.  (No we don't plant organic. 
 I'm addicted to Miracle grow).


Rabbit Garden and Game


A rabbit garden, for those of you who don't know, is a garden that's not protected by a fence or anything else and is expressly planted so that the rabbits and other critters can eat their fill.  Hopefully, this means they'll leave your main garden alone.  It's a very eco-friendly version of pest control.  Unfortunately, it's no match for a really good fence, but its a nice idea.  Ours is out by the edge of the woods, far behind the house, whereas the main garden is directly adjacent to the house where the deer at least are too nervous to wander.

We had four square raised beds for the girls to plant and a whole bag of different kinds of seeds.  When one of our girls was asked, "Do you know why we're planting a rabbit garden?"  She answered, "Because we can't all fit in the big garden at the same time."  While she wasn't wrong, the rabbit garden also let the girls choose whatever they wanted to plant and however they wanted to plant it (as opposed to my very organized main garden).

Since I was too busy to observe what happened there I'm just going to give you the OCD instructions I left for the mom in charge of this activity.  (She said she appreciated the detail and didn't think I was a crazy micromanaging lunatic at all. Really.)


Rabbit Garden
  1. Talk to them about why you have a rabbit garden.  It’s a natural form of pest control.  Feed the rabbits and they won’t be as hungry to try and get in OUR garden.  We like the rabbits and want to keep them though we don’t want them eating our vegetables.
  2. Have each group pick a square for them to plant and show them the seeds.  Then as a team they should discuss how they want to plant it.  Will it all be one type of seed, do they want to do several different types.  Do they want to do it in rows or scatted, etc. 
  3. Once the two of them can agree on what they want to do with their team square give them the seeds they need and a shovel each and let them go to town.  They can do it any way they want as long as they stay in their square.
  4. Once they’re done they will need to carry the watering can to the hose, fill it up and water the seeds.


Our four raised beds.  My Dad made them from scraps.

Planting seeds.


The second activity in this station was a game straight out of the Daisy Garden Journey Handbook.   We modified it only slightly to fit our needs.  I filled the bag with different types of rocks, branches, leaves and pinecones.

From the handbook.


Nature in a Bag Game
  1. We’ll give you a draw string bag with a handful of “natural” objects.  The girls should take turns reaching into the bag without looking and trying to name the objects. 
  2. Once they’ve both had a chance to feel all the objects dump them out to see how they’ve done.
  3. Let the girls search around to find a new and different object to add to the game for the next group of girls.  If they find more then one they like, ask them to pick the one they like best.
Gold Coins
I’ll also give you gold coins to give the girls after the whistle blows if they behave well.  Feel free to not give it if they don’t listen.


Clover


The craft group was actually two groups combined together.  We put up a large folding table and chairs in the yard.  I had boxes set up with all the supplies for each of the crafts as well as my OCD directions for the moms.  

The girls working of their Garden Posters outside.


Our garden posters were almost done at this point, only two flowers left including this one.  We had just done "Using Resources Wisely" on a field trip two weeks before and used this time to add Clover.

My Clover


A Girl's Clover

Supplies for Clover
1.  Multiple width petals cut from white cardstock. (Sorry, I can't remember where I got that shape).
2.  Multiple small clover leaves cut from green cardstock. (I used a picture of a real clover as a template).
3.  Green pipe-cleaners cut into one long and two short pieces.
4.  Googly eyes.
5.  Stapler.
6.  Elmer's type glue.
7.  Red and/or pink sharpies.

Directions given to mom in charge:


Projects: (I would make them stay together and clean up one project completely before moving on to the next.)

Clover Flower for Gardens
1. Hand out the gardens, a zip lock bag with all the flower pieces, and a glue bottle.
2. Pass around the picture of real clover, remind them that Clover “Uses Resources Wisely.”
3. The girls will whine, “I don’t have any more room.” Tell them they do have room and use my garden as a guide. Tell them flowers like to be close together.
4. The girls should glue down their pipe-cleaner stems. You will need to go around and staple the stems to the poster-board to re-enforce them. 
5. For the flower head, I recommend taking one of the larger white petal shapes and gluing shapes behind it to make it look layered. Then glue the completed head to the top of the stem. It doesn’t matter, though. If they don’t want to do it that way, just show them mine and let them do it however they want. 
6. Have them use the small green circles to make three and four leaf clover leaves
7. Glue on the eyes and use sharpies to draw on mouths.
8. If some girls finish way before others you can let them put on more ladybugs with the red sequin.


Suncatchers

Our second craft project didn't have anything to do with our Journey or Petals except maybe that I was able to get flower shaped wind chimes and garden stakes to paint. For the most part, however, it was just fun, easy, and good as Mother's Day presents.  

I got all the supplies from Oriental Trading:


Wind Chimes 


This is the Paint I bought, though unless you make 
lots of suncatchers I wouldn't buy this much.  


Garden Stakes 


Palettes I highly recommend.


If you get the above, the only other things you need is paper plates (if you don't have palettes), cups for water, and paint brushes.   Here were my instructions for the mom in charge:

Sun Catchers
1. Give them each a paper plate and have them write their name on it.
2. Each girl gets one bug suncatcher for the garden and one mobile suncatcher (the second in a mother’s day gift so remind them to not let their mom’s know.  No surprise for you, sorry :S)
3. Have them go to the hose and carefully fill up a water cup.
4. They get one pallet and can chose 6 colors and only six colors, they can squeeze it themselves if they don’t overflow and waste it (tell them if they start to mix colors and make a mess they won’t get any more because the paint is expensive).
5. Let them paint and create and lovely peace. (ahh 5 minutes of calm)
6. They can each choose one additional sun catcher if they want and you aren't running short on time.
7. Put the sun catchers on the plate to dry so I know whose is whose and have the girls wash out the paint supplies with the hose.


Planters

I think only one group got to the "planters," but it really didnt matter.  This last craft involved using craft supplies I already had lying around to decorate the shoe boxes the girls had brought.  

Directions for moms:  
1. Each girl should have brought a box to use to as a “planter” to bring home extra plants.
2. They can use construction paper, markers, crayons, and stickers to decorate their box.
3. Make sure they put their name on the side.


Wrap up


After our stations, we asked the girls to help us clean up.  When they were done, everyone got ice cream sandwiches and got to play in the yard until their parents came to pick them up.  At that point, everyone got 6-8 plants to put in their "planter" and take home.


Tomatoes right before planting


Peppers ready to plant


Afterward: Harvest


We started harvesting the vegtables the last week in June.  My husband and daughter made our first drop off at the food bank.  Starting in July, each girl signed up for a week where she came over and helped us pick vegetables.  Each family was responsible for the delivery of these vegetables to the food pantry that week.  

Not every food bank takes fresh vegetables.  Ours was a 30 minute drive.  They are out there so if you want to do this project, and I so completely recommend it, its worth the effort to find one that does.  The girls loved it, the food bank was very appreciative, and the parents felt good about it.  All in all I found it extremely satisfying.


Peas from the first harvest

Picking beans

The first harvest: beans, lettuce, and squash

Zucchini!


Picking a pepper.


Harvesting from the mid-summer garden

cucumber

Mid-summer harvest: cucumber, peppers, beans, tomatoes

Tomato and pepper plants


The garden late-summer