I'm taking another quick break to share the SWAPS our girls made for the Core Camp we went on at the beginning of October. I wasn't completely thrilled with how these ended up looking, but I can't imagine the girls enjoying making SWAPS more and for that alone, I'd make them again.
The basis if these was a simple salt-dough cut into fall and halloween shapes. We experimented with different ways to color the dough and added glitter for sparkle. Unfortunately, the colors faded considerably as the dough dried out, so in the end the girls colored them with sharpie anyway.
The basis if these was a simple salt-dough cut into fall and halloween shapes. We experimented with different ways to color the dough and added glitter for sparkle. Unfortunately, the colors faded considerably as the dough dried out, so in the end the girls colored them with sharpie anyway.
Fall Salt-dough SWAPS
 |
| Finished SWAPS |
Supplies (to make them exactly as we did. Not all are necessary.)
1. Sack of flour
2. Box of Salt
3. Water
4. Glitter
5. Food coloring
6. Paint
7. Small cookie-cutters
 |
| Wilton's mini-cookie cutter fall set |
9. Rolling pin
10. Bowls
11. Wax paper
12. Toothpicks
13. Twine
14. Pony beads
15. Sharpies
16. Safety pins
17. Paper tags
Group Activity (we did this for four girls).
Do this at least 1 week before you need the SWAPS.
1. Make the salt doughs: The ratio is approximately 2 parts flour to 1 part salt to 1 part water. Because we added different things to make them colorful and sparkly, I never measured the water, just added it until it was the consistency I wanted. Each of the girls mixed up at least one batch by themselves. I had one ready to show them when they arrived.
1. Make the salt doughs: The ratio is approximately 2 parts flour to 1 part salt to 1 part water. Because we added different things to make them colorful and sparkly, I never measured the water, just added it until it was the consistency I wanted. Each of the girls mixed up at least one batch by themselves. I had one ready to show them when they arrived.
 |
| The girls mixing up the salt dough |
 |
| Yes, I recommend mixing it by hand |
We made several salt-dough variations:
a. Silver white - we added white and silver glitter to the flour and salt.
b. Black- before adding the water we added black tempera paint to the flour and salt and mixed it until we got a black,( the consistency was really sticky) then we added the water.
c. Orange- we added orange glitter to the flour and salt, and orange food coloring to the water before adding that.
d. Brown- we added brown glitter and cinnamon to flour and salt. Once mixed we used brown tempera paint.
e. Red- same as orange
f. Yellow- same as orange
g. Green- same as orange
2. Make Marble dough for the fall leaves: Combine several fall colors into a ball and roll them out to cut out leaves.
 |
| Marbled dough |
 |
| Dough Rolled Out |
3. Roll out other doughs: We had the four girls each roll out one dough but after using that dough for 5-10 minutes they would rotate to the next dough, so they each were able to use each color and no one got bored.
 |
| Dough for ghosts and sculls |
 |
| Dough for black cats, haunted houses and witches hats |
4. After transferring the shapes to cookie sheets use toothpick to make a hole to tie string on for later. Some of the girls also carved on faces and designs on some of them.
5. We used the extra dough to sculpt ghosts and pumpkins. We didn't use those for swaps but you could.
 |
6. Dry the shapes: We had too many cookie sheets to dry all the shapes in oven. To dry them completely they would have likely taken ~5 hours each at 200F. Instead, we did 1-2 hours at that temperature. This dried out the top and sides completely, then we put them aside for a day or two to finish drying out. With no baking at all I would give a minimum of 5 days to dry.
 |
| Ready for oven |
Individual Activity (or how me and my daughter finished ours up)
1. We had the girls divide up the SWAPS amongst themselves to bring home and finish.
2. I had my daughter decorate hers with my vast sharpie collection anyway her heart desired.
3. Using black twine and a large beading needle I threaded each SWAP and knotted it on top.
4. My daughter put a bead on the top.
5. I knotted it again and put in a pin.
6. I printed out little tags with the date and troop number (my daughter likes tags) and she wrote her name (just first name) on the back.
7. I pinned on the tag
Ta da!
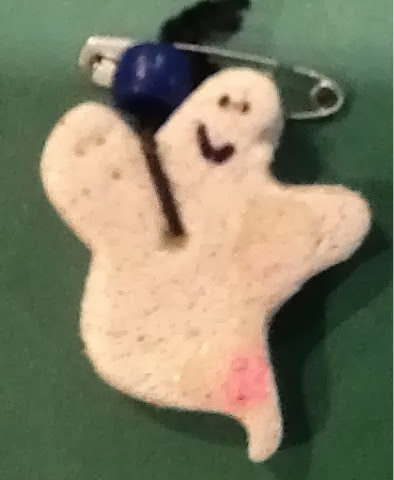 |
| One of my 6 year-old's ghosts |
 |
| An apple with a worm in it |
 |
| My daughter's version of a "spooky" skull |
 |
| Leaves decorated in various ways |
 |
| Our more "spooky collection." |
 |
| A purple acorn, a pumpkin and a apple with a smiley face carved into it. |
 |
| Same leaf three ways. Top one has sharpie outlining the colors from the marbling, right one with a visiting ladybug, and bottom one without any decoration. |
No comments:
Post a Comment